Author Archives: blogginggazelle

Ramsay Cascades

Miles:  4.0 miles           Elevation Gain:   2,269↑         Elev./Mi:   567         Grade:  11%          

Difficulty:  Class HC    Hiking Time: 1:51       Pace:  2.16 mph        Avg. Temp.:   31        

Total Hike:  8 miles    Total Hike Time: 3:24         Avg. Pace:   1.8 mi./hr.

Total 900 Miler Miles:   57.7   Total Miles Hiked:   73.5

Ramsay Cascaeds

Ramsay Cascades Elevation

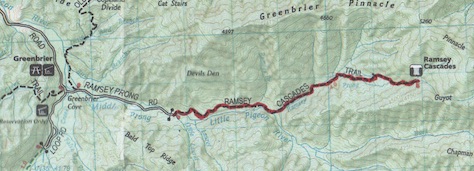
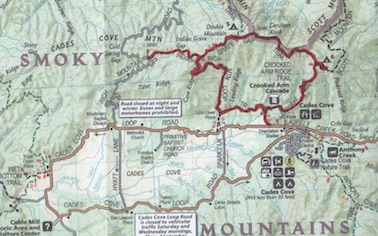
Ramsay Cascades is another crown jewel of the Great Smoky Mountain National Park and like most good rewards, it has to be earned, if for no other reason than just getting there.  First, one must survive the madness that is Gatlinburg but if you are willing to get an early start, you can manage to miss the flood of humanity, both biped and automobiled, that engulf the streets.  The Greenbriar Park Entrance is located along US 321 about 6 miles northeast of Gatlinburg.  Less than  mile in, the paved Greenbriar road stops at the ranger station and becomes a gravel road, sometimes narrowing to a single lane.  Just past 3 miles in, the Ramsay Prong road turns left across a single lane bridge and continues for another mile and a half to a parking area at the trail head.  Those arriving early should find ample parking but beware a midday start.  This is a very popular trail and the small primitive parking area tends to fill up.

Middle Prong of the Little Tennessee at Ramsay Cascades Trail

Middle Prong of the Little Tennessee

IMG_1644

Boulder along Ramsay Cascades Trail

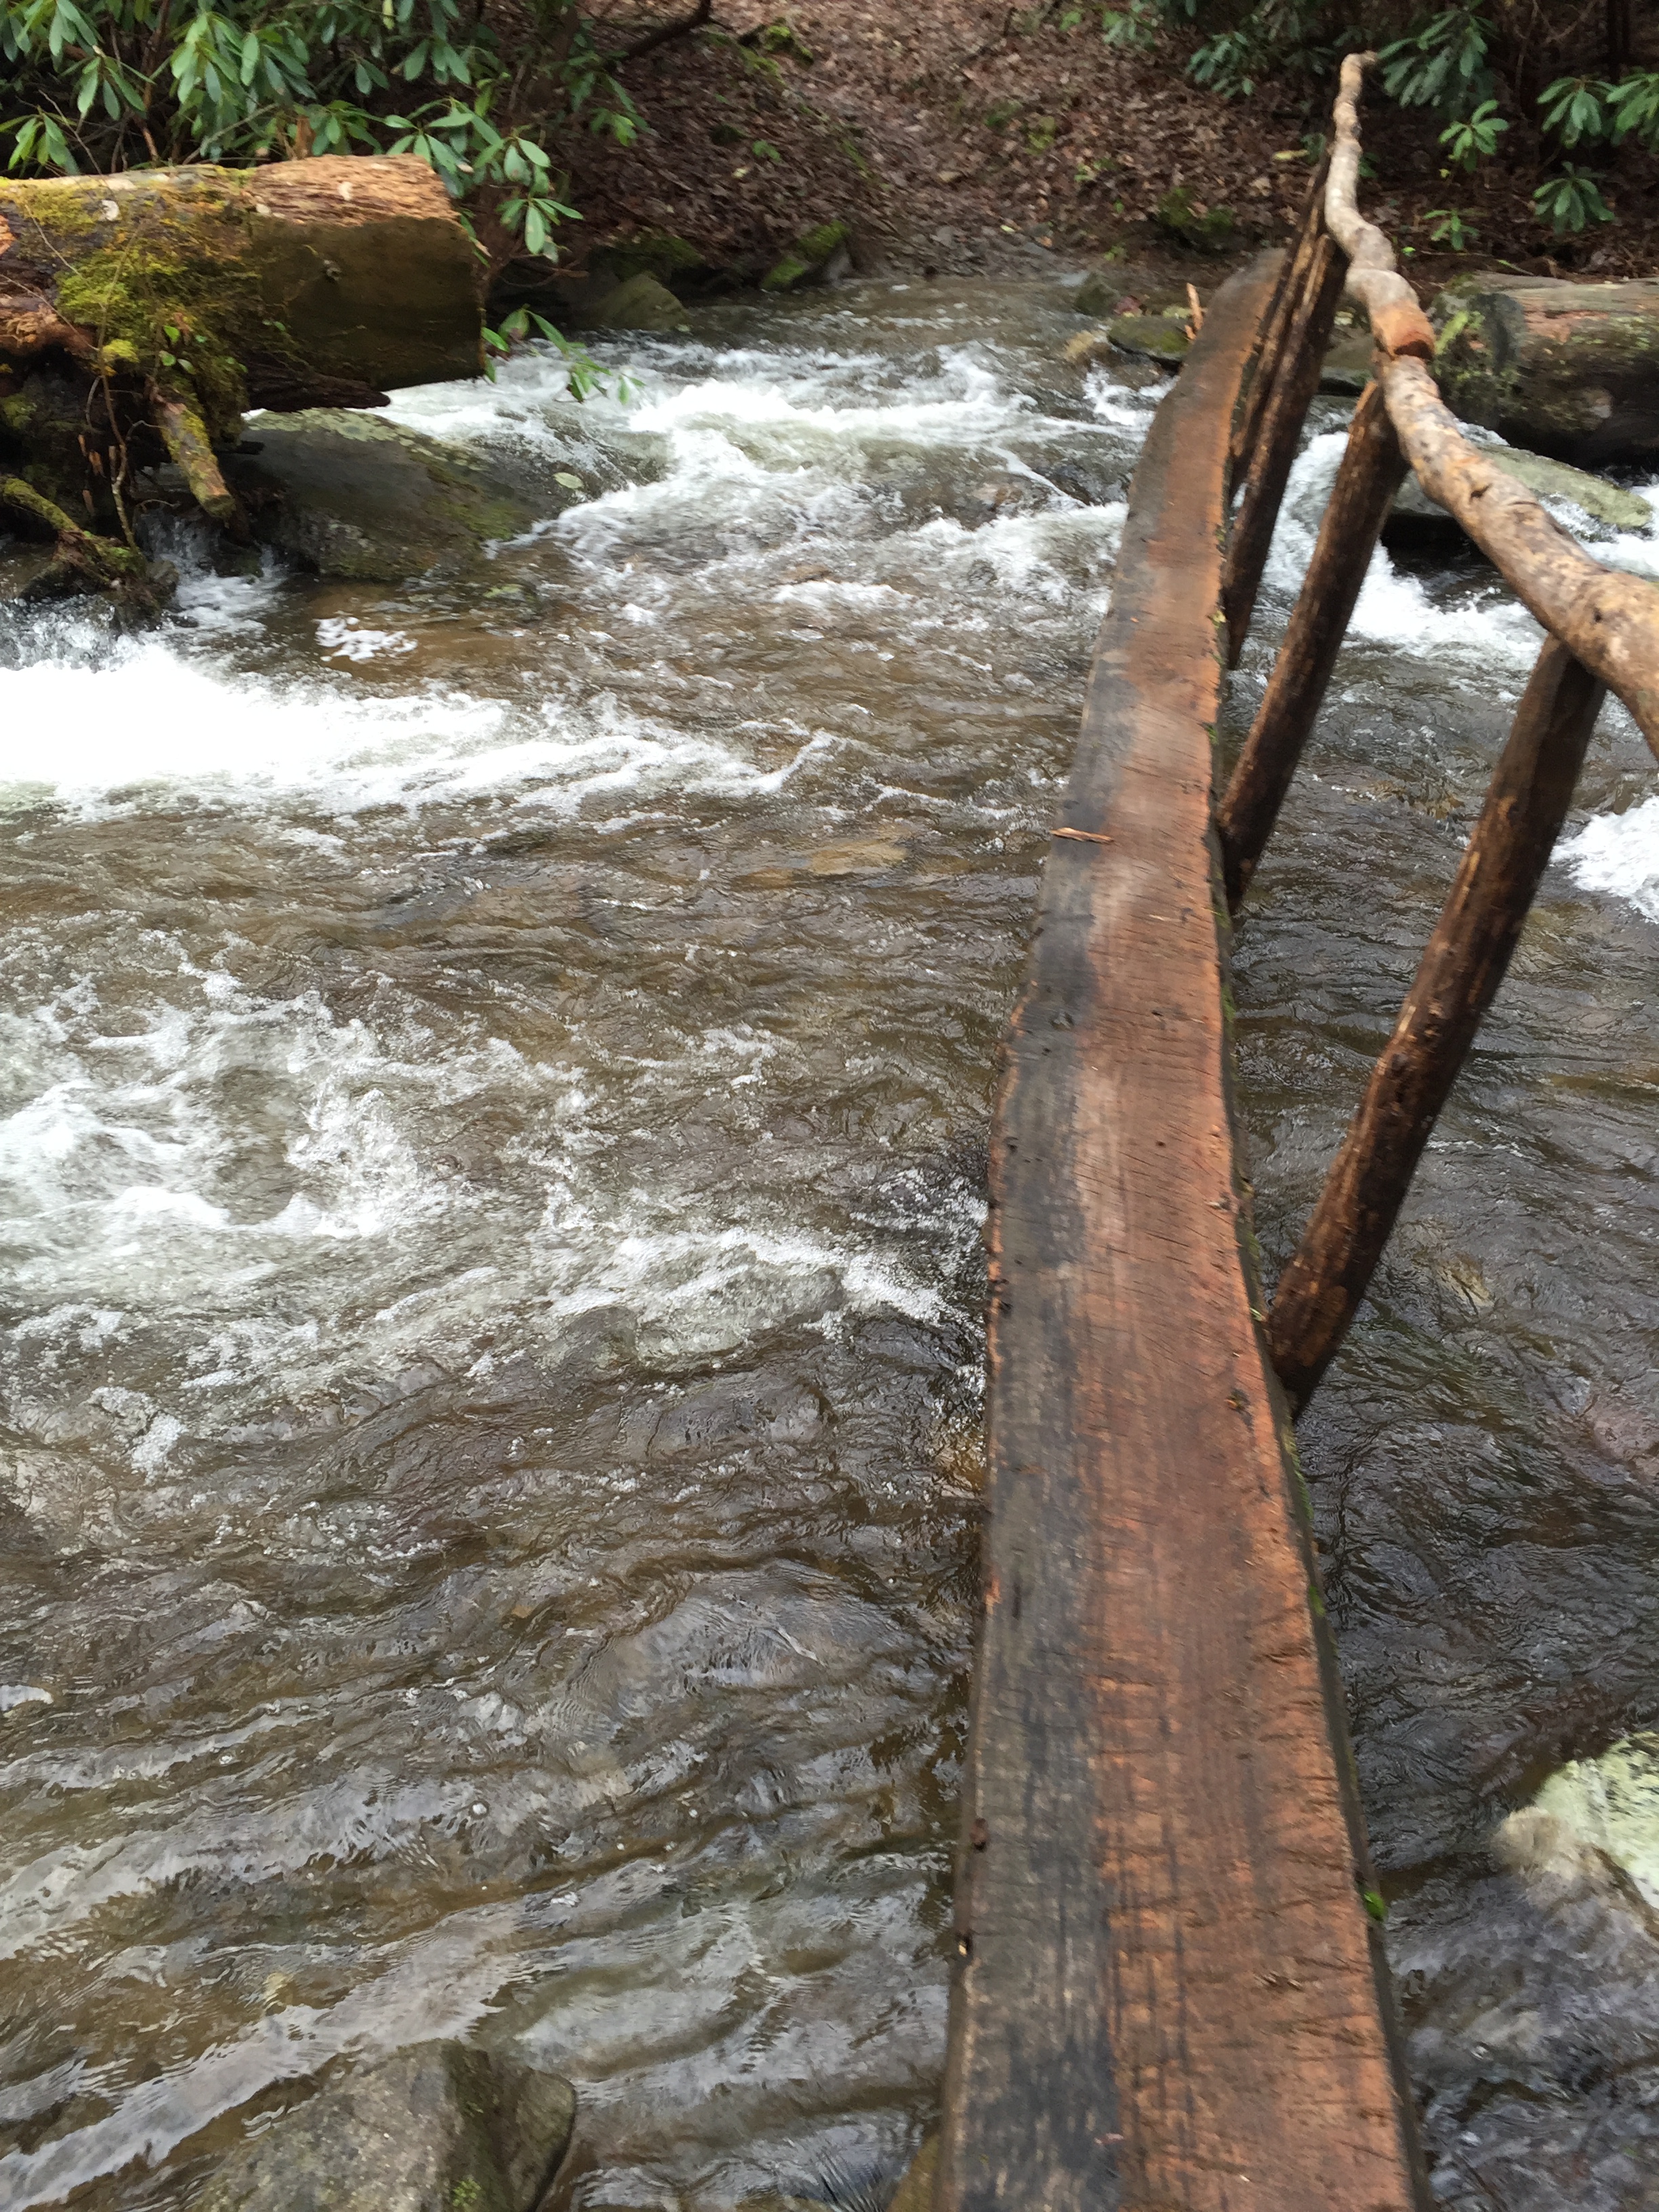
Having navigated a virtually empty Gatlinburg, we arrived at the trailhead about 8:45.  Ramsey Cascades Trail does not tie into any other trail section so it can only be hiked as an out-and-back.  We set off hiking at 8:53 with the thermometer reading 28 degrees.  Ramsay Cascades Trail welcomes you through a portal that is a footbridge over the Middle Prong of the Little Pigeon river.  The trail begins along a nice gravel road and climbs steadily after you cross the bridge following Middle Prong.  Ramsay Cascades seems bigger than most trail experiences in the Smokies.  The rapids in the streams seem bigger.  The rocks and boulders seem bigger and there are old growth trees that don’t look like they belong here.  Then of course there is the waterfall that awaits you at the top.  Green moss and rhododendron exude a fairyland atmosphere, even in wintertime.  John Muir would ponder the rock formations of Yosemite, wondering how they got there and how they were formed.  Similar thoughts occur as you pass along huge boulders and witness giant rocks strewn haphazardly along Middle Prong and Ramsay Prong.  Just as Muir proposed how the rocks of Yosemite were living creatures, vital to the very foundation of creation, so too these rocks formations seem to have a personality and their creative placement along the way is shrouded in mystery.

IMG_1662

One of two large tuliptrees

IMG_1684

“Roman Columns”

Then there are the trees.  For some reason, in the lower section of the trail, several huge specimens of tulip poplars and locust trees were spared the harvest of the lumber companies prior to the establishment of the Park.  Even as they die and fall, the souls of these mighty tree people still command a presence you can feel as you pass through a cut out section in a blow-down.  At 2.6 miles, you pass between two huge, straight tulip trees that the guidebook describes as majestic Roman columns.  Although useful as a description, the grandeur of these trees cannot be captured in caparison to anything made by humans.  For one thing, they are centuries in the making and will probably be here long after our temples have crumbled.  Just a few hundred feet beyond the “Roman Columns”, there is a small clearing guarded by an even bigger tulip tree.  A quartet of hikers managed to barely reach around the tree by holding hands as they circled its huge base.  For me, the hike to this point was worth the effort, just to be in the presence of these living creatures that were here before humans were.

IMG_1667 The last mile tests the hiker’s resolve as you gain 969 feet for a grade 18%.  The trail is steep and narrow, often with steps to assist in the climb.  Although the trial follows Ramsay Prong much of the way, providing a musical chorus, suddenly, the chorus reaches a crescendo as the waterfall comes into view.  As we were scrambling over the few remaining boulders, I noticed an obvious footprint with 5 distinct toes.  My companion and I had been discussing earlier the art of barefoot running and that transpired to barefoot hiking.  I remarked that I had yet to see a hiker sporting the Vibram 5-Finger shoes, let alone a bare-footer.  My Scout Craft proved true as we soon met the owner of the 5-Finger shoes at the top.


IMG_1673

Rock Ledge at Ramsay Cascades
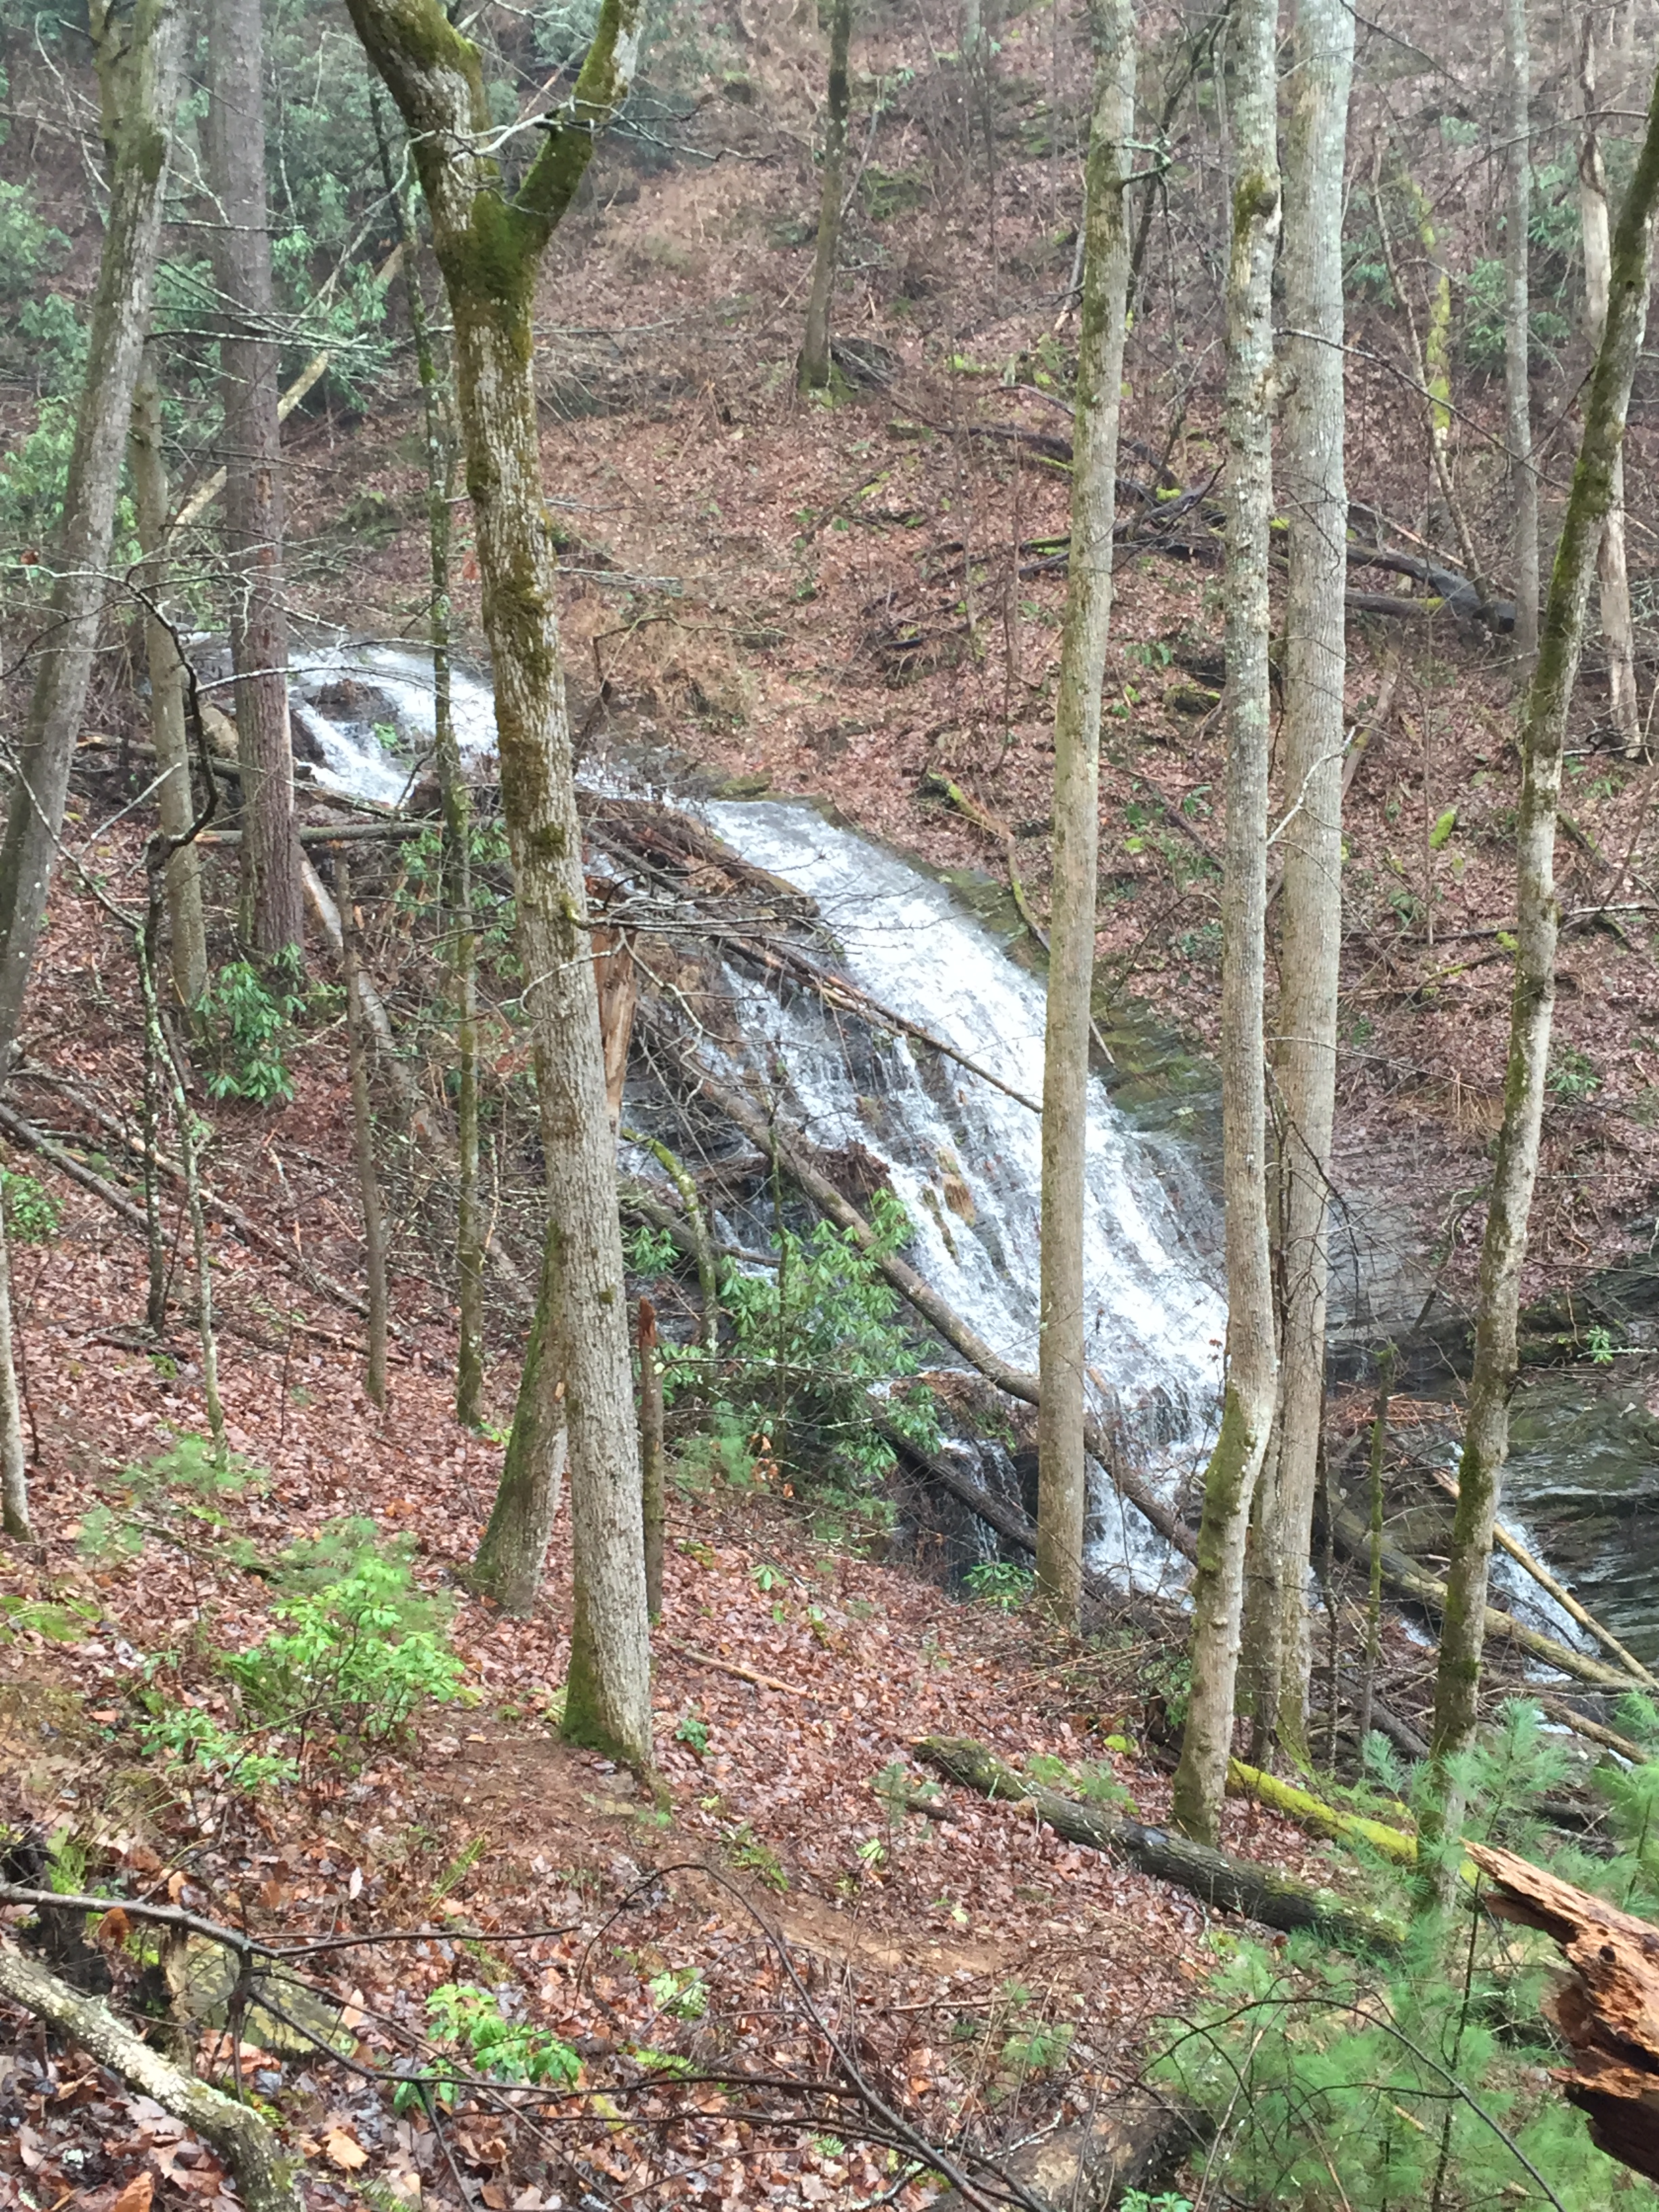
IMG_1672

Ramsay Cascades

At 10:45, we reached the rock ledge that provides a front row seat to a mighty rendition of water music.  The 90 ft. waterfall lands in pool atop a section of flat rock that, even despite the subfreezing temperature, beckons a refreshing dip.  To our fortune, we were the second pair to arrive, giving us the privilege of a private performance for more than 20 minutes.  On a summer day, you may find 30 or more people here, many of whom have ignored the sign warning of certain death should one loose control of one’s children, and availing themselves of the cool water in the pools below the falls.  Alas, the thermometer settled on 31 degrees as we donned more clothing and found our seats.  New to my gear list is a pair of insulated mittens and a down jacket.  These provided considerable warmth and comfort for the show that beset us.  The other pair in our small audience, having left, were soon were replaced by a trio who set about taking pictures and asking for our services as photographers.  Of course we complied but by then, we were ready to head back down.

IMG_1680

Wintertime Fairy Land

IMG_1687

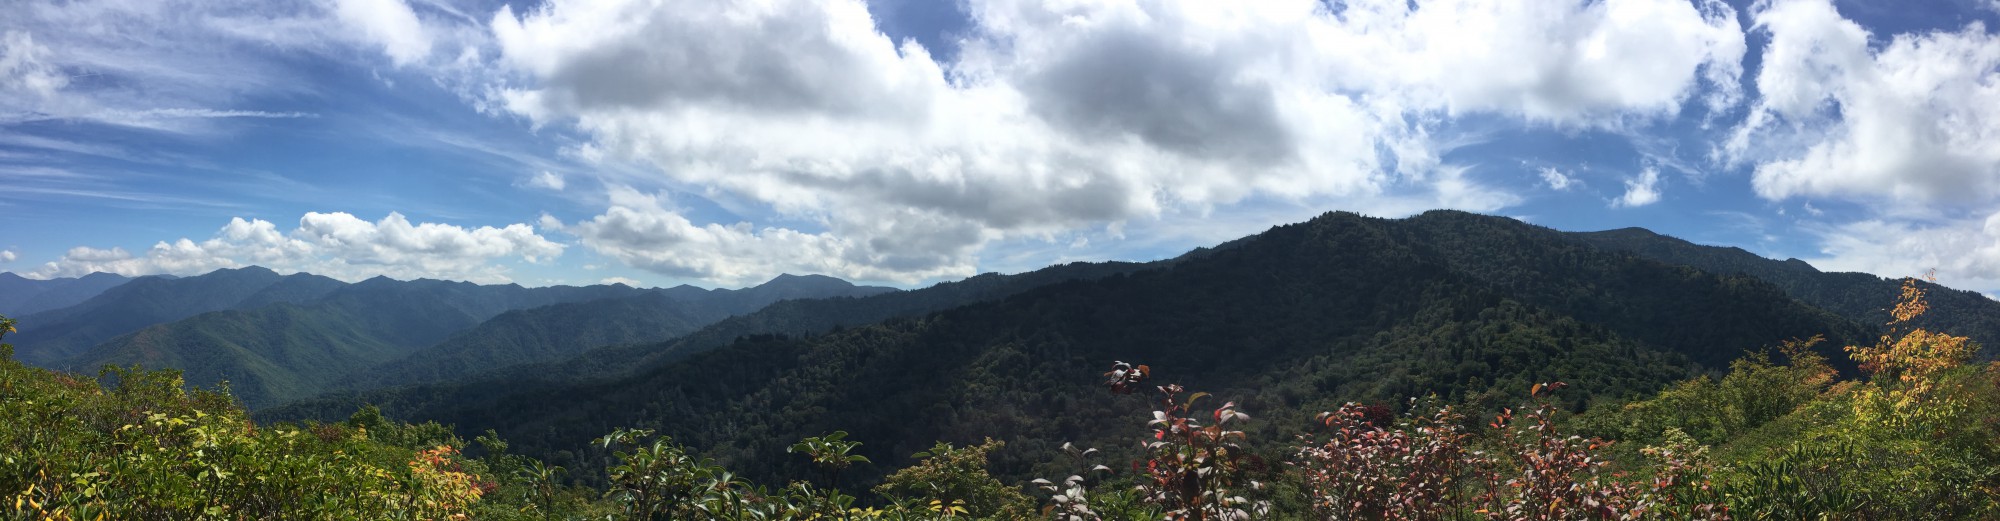
Middle Prong on a Clear Day

The blessing of our early start was made more obvious by the number of people we passed on our descent.  Our timing had been near perfect.  The nice thing about an out-and-back hike, especially when you are in a cathedral of trees and among sacred statues of rocks and boulders, is you get to see it all again.  By now, the sun was above the ridges and the blue sky offered contrast to the green appointments of the moss and rhododendron.  We assured our fellow pilgrims headed up that the arduous climb was indeed worth it.

It was a few minutes after 1:00 when we arrived at the packed parking area.  In a moment recalling a miserable experience at a crowded shopping mall, a fellow pulled up and waited for me to exit my parking space.  He was polite but insistent nonetheless.  This merely foretold of the mob scene that hit us after our descent into Gatlinburg.  After a 20 minute journey to travel 3/4 mile, we celebrated the day with burgers at Smoky Mountain Brewery.  And good burgers they were.

My thanks to my hiking partner, Bryan Shuler, who provided company, conversation and modeling services for my photographs.

Campsite 6 – Turkeypen Ridge

Campsite 6

Campsite 6

Campsite #6

Scott Mountain Trail – 200 yards from intersection with Indian Grave Gap Trail

Capacity: 8

Rating: 6

Water: A spring is located on the back side of the ridge from the campsite.


CS 6 is a welcoming site located on a small ridge off Scot Mountain Trail.  There are two grassy sections with a few nice spots for tents.  There is only one fire ring and bear cables are close.  The site is well used but impact is pretty minimal.  There are no signs of privy use in the area.  Water is located at a nice spring on the back side of the ridge from the campsite.  There is not an established trail to the spring and the bank is rather steep.

Rating Summary:

  • Ample Water
  • Bear Cables
  • Low Impact
  • Dry and Level Tent Sites
  • X Factor

Crooked Arm Ridge Trail

Miles:  2.2 miles           Elevation Gain:   1480↓          Elev./Mi:   672          Grade:  13%          

Difficulty:  Class HC     Hiking Time: 0:53       Pace:  2.5  mph        Avg. Temp.:   43.5         

This trail was part of a loop hike from Rich Mountain Loop Trail

The Trail

Crooked Arm Ridge Trail runs between Rich Mountain Loop Trail and Indian Grave Gap Trail.  The closest accessible trailhead is 0.5 miles on the Rich Mountain Loop Trail from its trailhead at Cades Cove.  The Crooked Arm Cascade is at 0.2 miles.  From there the trail earns its namesake as it climbs rather steeply through several switchbacks for the remainder of its length.  Along the trail there are beautiful views of Cades Cove.

Although there are no campsites on the trail, there is Campsite 6 near on Scott Mountain Trail the intersection with Indian Grave Gap Trail.

Crooked Arm Cascade

Crooked Arm Cascade

Indian Grave Gap Trail

Miles:  3.7 miles           Elevation Gain:   1125↑          Elev./Mi:   304          Grade:  6%          

Difficulty:  Class 3+     Hiking Time: 2:00       Pace:  1.85 mph        Avg. Temp.:   43.5         

This trail was part of a loop hike from Rich Mountain Loop Trail

+ All the climbing occurs in the first 2.3 miles which makes the climb gain 489 ft./mi. and is a 9% grade

The Trail

Indian Grave Gap Trailhead

Indian Grave Gap Trailhead

The trailhead is on Rich Mountain Road which is a one-way gravel road leading from Cades Cove.  It is inaccessible during the winter months.  Other access is from Rich Mountain Loop Trail, Rich Mountain Trail and Crooked Arm Ridge Trail.

Indian Grave Gap Trail climbs steadily from the trailhead for the first 2.3 miles averaging a little over 489 ft. per mile.  Once on the ridge, the trail is a descends ever so slightly and is a delightful walk along a ridge.  AT 1.1 mile, the trail intersects with Rich Mountain Loop Trail which leads 3.4 miles to Cades Cove.  At 1.4 miles there is a side trail leading 200 feet to an open nob where there remains a foundation for a fire tower.  At 1.9 miles, the trail intersects with Rich Mountain Trail that leads 2.3 miles down to Rich Mountain Road at the Park Boundary.  The trail ends at the intersection with Scott Mountain Trail and Crooked Arm Ridge Trail which leads 2.2 miles to Rich Mountain Loop Trail.

Fire tower site in Indian Grave Gap Trail

Fire tower site in Indian Grave Gap Trail

Indian Grave Gap Trail Junction

Indian Grave Gap Trail Junction

Rich Mountain Loop Trail

Miles:  3.4 miles           Elevation Gain:   1365↑          Elev./Mi:   401          Grade:  8%          

Difficulty:  Class 4+    Hiking Time: 2:10       Pace:  2.31 mph        Avg. Temp.:   72.2    

Hiking Time:   1:23     Avg. Pace:   2.5 mi./hr.   

Total Hike:  11.1 miles    Total Hike Time: 5:30        

Total 900 Miler Miles:   53.7   Total Miles Hiked:   65.5

+ I rated the trail Class 4+ because the rating system is a bit deceiving.  The difficulty rating considers the total mileage of the trail.  In this case, the trail is nearly level for the first mile and a half.  The actual climb is 1,365 feet over 2 miles and it’s a difficult 13% grade.

Rich Moutain LoopThis hike was part of a loop that included Indian Grave Gap and Corked Arm Ridge Trails with a short stretch on Scott Mountain.  The trailhead is easily accessible from the parking area at the head of the Cades Cove Loop.  The weatherman promised a “clear day” but these are the Smokies.  The temperature was low 40’s but it was very

cloudy and overcast at 8:53 am.  At times the fog was pretty thick.  Hiking in the fog gets you wet without the rain.  Overall, this is a very nice hike.  On a clear day, there are views of the Cove as Rich Mountain Loop Trail gains elevation.  There are two campsites on this loop and Crooked Arm Cascade is a nice feature.  There are several small stream crossings but all are dry crossings with a little rock hopping.

Foggy conditions on Rich Mtn. Loop

Foggy conditions on Rich Mtn. Loop

It was 10:16 when I got to Indian Grave Gap, covering the distance at 2.5 miles per hour.  I had a decision to make.  The trail goes west to its trailhead on Rich Mountain Rd.  Skipping it would create an orphan hike but since today was a fairly low mileage day, I decided to grab it.  I met a trio of ladies at the intersection and we exchanged greetings.  They were hiking a fairly aggressive loop out of Ace Gap and were going to road walk Rich Mountain Road.  I asked if they were 900 milers and they were somewhat undecided.  They moved down Indian Grave Gap ahead of me while I had a drink of water and a snack.

As I caught up with them, unfortunately, I gave them quite a start.  Normally I am pretty good about announcing my presence when I come up behind hikers but I thought in the case, since our introduction was barely 20 minutes in the past, they would be expecting me.


Fire tower site in Indian Grave Gap Trail

Fire tower site in Indian Grave Gap Trail

On the return, I met a man and his son.  The father mentioned he had just started his first 900 miler so I gave him a few hints about information.  The weather remained foggy and cool on the steady climb up Indian Grave Gap.  At about 1.8 miles, I passed a side trail with no sign.  It led about 100 yds. up to a nob where there had been a lookout tower at one time.  This would be a rather nice camping spot if not for the Park’s requirement to camp in established campsites.  Along the ridge there are spectacular views of Cades Cove…when you can see them.

At the Rich Mountain Trail, I decided skip past the 2.2 mile trail creating an orphan I will have to catch at a later time.  Continuing along, I came to the intersection with Scott Mountain Trail and Crooked Arm Ridge Trail.  It was lunch time and Campsite 6 was just a couple hundred yards down Scott Mountain so I decided to break for lunch there.  There was a sign from the Park Service on a tree at CS 6 stating that the Scott Mountain Trail was closed beyond all the way to School House Gap.


Campsite 12

Campsite 12

A cool foggy atmosphere has it’s own charm in a way.  CS 6 is a nice little campsite and the close mist, even though a bit melancholy, created a stillness for contemplation.  I took along my copy of John Muir – Spiritual Writings edited by Tim Flinders.  It’s a great little book that highlights Muir’s spiritual perspective, which is often overlooked by many of his biographers.  Flinders pulls together a lot of passages from Muir’s letters and journals that underscore the fact that he considered wilderness to be sacred and the place where God is most likely to interact with us.  Muir wrote of his time in Yosemite, “…I have spent every Sabbath for the last two months in the Spirit World.”  I barely got into the introduction where Flinders gives us a brief biography of Muir in a spiritual context before chills from the damp weather required me to warm up again.

Not like my taking the veil – no solemn abjuration of the world.  I only went out for a walk, and finally concluded to stay out till sundown, for going out, I found, was really going in. – John Muir

Crooked Arm Ridge Trail was aptly named for its many switchbacks on a fairly short trail.  toward the end, I was treated with the Crooked Arm Cascade.  Then back to the Rich Mountain Loop Trail with a half mile hike back out to the trailhead.

The Trail

Meadow along Rich Mountain Loop Trail

Meadow along Rich Mountain Loop Trail

The trailhead leaves the Cades Cove Loop Road. near the main parking area at the gate.  For the first mile and a half, the trail is very level and skirts a couple of the meadows off the Cove.  At 1.4 miles, there is a pleasant surprise if you’re not expecting it.  The trail passes the John Oliver Cabin, which is one of the many features of Cades Cove.  Oliver was one of the first settlers of European descent in the Cove and the cabin is well preserved and maintained.  At that point, the trail turns right and begins to climb steadily.  All of the elevation gain (1,365) is over the next 2 miles or so making the climb a challenging 13% grade.  The trails ends at 3.4 miles at the intersection with Indian Grave Gap Trail.

John Oliver Place

John Oliver Place

Stove Boil-Off

You cannot walk far in the way of Ultralight Backpacking without running across those who are passionate about their alcohol stoves.  And why not?  They are extremely light and you can make your own at very minimal cost.  What’s more, there are many websites dedicated to showing you how to make and use your own stove.  One in particular is www.thesodacanstove.com.  This site has great instructions on how to make different stoves and it has a well done comparison between all the main types of cooking methods including open fire, wood stove, canister and liquid fuel, alcohol and solid fuel.  One thing that most of the websites I have seen are lacking is how the alcohol stove compares with others in terms of how much time it takes to boil water.  As you will see, this amounts to a significant omission.  In full disclosure, I am no where near achieving Zen status when it comes to the alcohol stove.  There are a lot of designs and I am sure some are more efficient than others.  However, the few videos I observed on the topic confirmed my results as being in the ball park.  For this test, I chose the popular cat food can design.  The website shows you how to make one.  They are really easy.

As for the other stoves in the test, they are from my own personal collection.  While there are many designs and technologies deployed today, I believe these models exemplify each type of stove sufficiently for this purpose.  They all have their advantages and disadvantages, which are pretty well known with minimal research.  The main purpose of this test is to compare boiling times, weight and general cost of each stove type.

The Setup

IMG_1592The test was conducted in my garage with the door open.  There was a bit of a breeze but not significant. The ambient air temperature was 63.7 deg.  The altitude of my garage is 1337 ft. above see level and the barometric pressure at the time of the test was 30.05 in. of mercury.  These parameters are significant in that they affect the actual boiling temperature and the time to boil the water.  In order to make sure I had a solid reference, I heated some water and tracked the temperature until it stopped at 208 deg. at a full boil.

Equipment

IMG_1594I used my trusty flat scale to insure I used a constant amount of water for each test.  I chose 12 oz. of water because that is typical for a single serving of freeze dried foods.  I used a typical digital oven thermometer to track the temperature of the heated water.  I used a two gallon bucket to hold plenty of water and the temperature of the water from the tap was 62 deg.  For timing, I used the stopwatch function of my wristwatch.  The container I used was my 16 oz. titanium cooking pot.

Testing Method

IMG_1595For each test, I dipped the pot in the bucket of water to make sure it started at the same temperature. The I used the scale to measure exactly 12 oz. of water.  After lighting each stove, I adjusted to full flame.  In the cases of the liquid fuel stove and the alcohol stove, I gave each enough time to warm up to the point of vaporizing the fuel.  I set the pot on the stove and started to watch, tracking the time until the moment the thermometer read 208 degrees.  It should be noted that I did not use a windscreen for any of the tests.  They are discouraged in the use of canister stoves for safety reasons.  For liquid fuel and alcohol, they can provide improvement but I decided to remove it as a variable.

The Stoves

MSR Pocket Rocket

This is my current go-to model and I love it.  It is a canister type and it is very small, compact and lightweight.

IMG_1596Specs:

  • Type:                                                 Canister
  • Stove Weight:                                  3.0 oz.
  • Fuel and Canister Weight:             8.0 oz. (4 oz. fuel)
  • Total Weight:                                    11.0 oz.
  • Cost:                                                  $39.95

MSR WindPro

I have been a white gas devotee since my Boy Scout days and I have used the MSR Whisperlite for many years.  It remains a great stove choice for extended trips, colder temperatures and higher altitudes.

IMG_1597Specs:

  • Type:                                                 Liquid Fuel
  • Stove Weight:                                  6.4 oz.
  • Fuel and Canister Weight:             9.8 oz. (4 oz. fuel)
  • Total Weight:                                    16.2 oz.
  • Cost:                                                  $99.95

Cat Food Can Alcohol Stove

It took about 15 minutes to make this stove with the can and a paper hand punch. The cat food, alas, was not necessary for the test and consequently, it was not spared nor donated for the benefit of any feline.

IMG_1598Specs:

  • Type:                                                 Homemade Alcohol
  • Stove Weight:                                  0.2 oz.
  • Fuel and Canister Weight:             5.0 oz. (4 oz. fuel)
  • Total Weight:                                   5.2 oz.
  • Cost:                                                 $1.98 for the cat food

The Results

  Model   Type Boil Time Weight Cost
  MSR WindPro   Liquid Fuel 2:15.40 16.2 oz. $99.95
  MSR Pocker Rocket   Canister 2:19.59 11.0 oz. $39.95
  Cat Food Can   Alcohol 11:32.10 5.2 oz. $1.98

Conclusions

It should be noted that the 1 oz. of fuel ran out during the alcohol stove test but I was able to refuel and relight within 15 seconds or so.  I left the total time because in the end, it did not seem to be significant.

There is a clear advantage in weight and cost of the homemade alcohol stove but a significant price is paid for boiling time.

For 6 oz. in exchange for 9 minutes, I think I’ll stick with the Pocket Rocket!

Campsite 12 – Forge Creek

Campsite 12

Campsite 12

Campsite #12 – Forge Creek

Gregory Ridge Trail – 2 miles from trailhead

Capacity: 12

Rating: 2

Water: Forge Creek 100 yds.


CS 12 is barely more than a wide place in the trail.  The fire ring is about 15 feet off the trail.  The site is highly visible.  The impact is moderate to high.  There are two main camping areas with fire rings.  The upper area is a little less impacted and more conducive to tarps with better draining tent sites.  There is no evidence of privy activity nearby.  Water is in ample supply nearby from Forge Creek.

Rating Summary:

  • Ample Water
  • Bear Cables

Campsite Rating System

IMG_1194
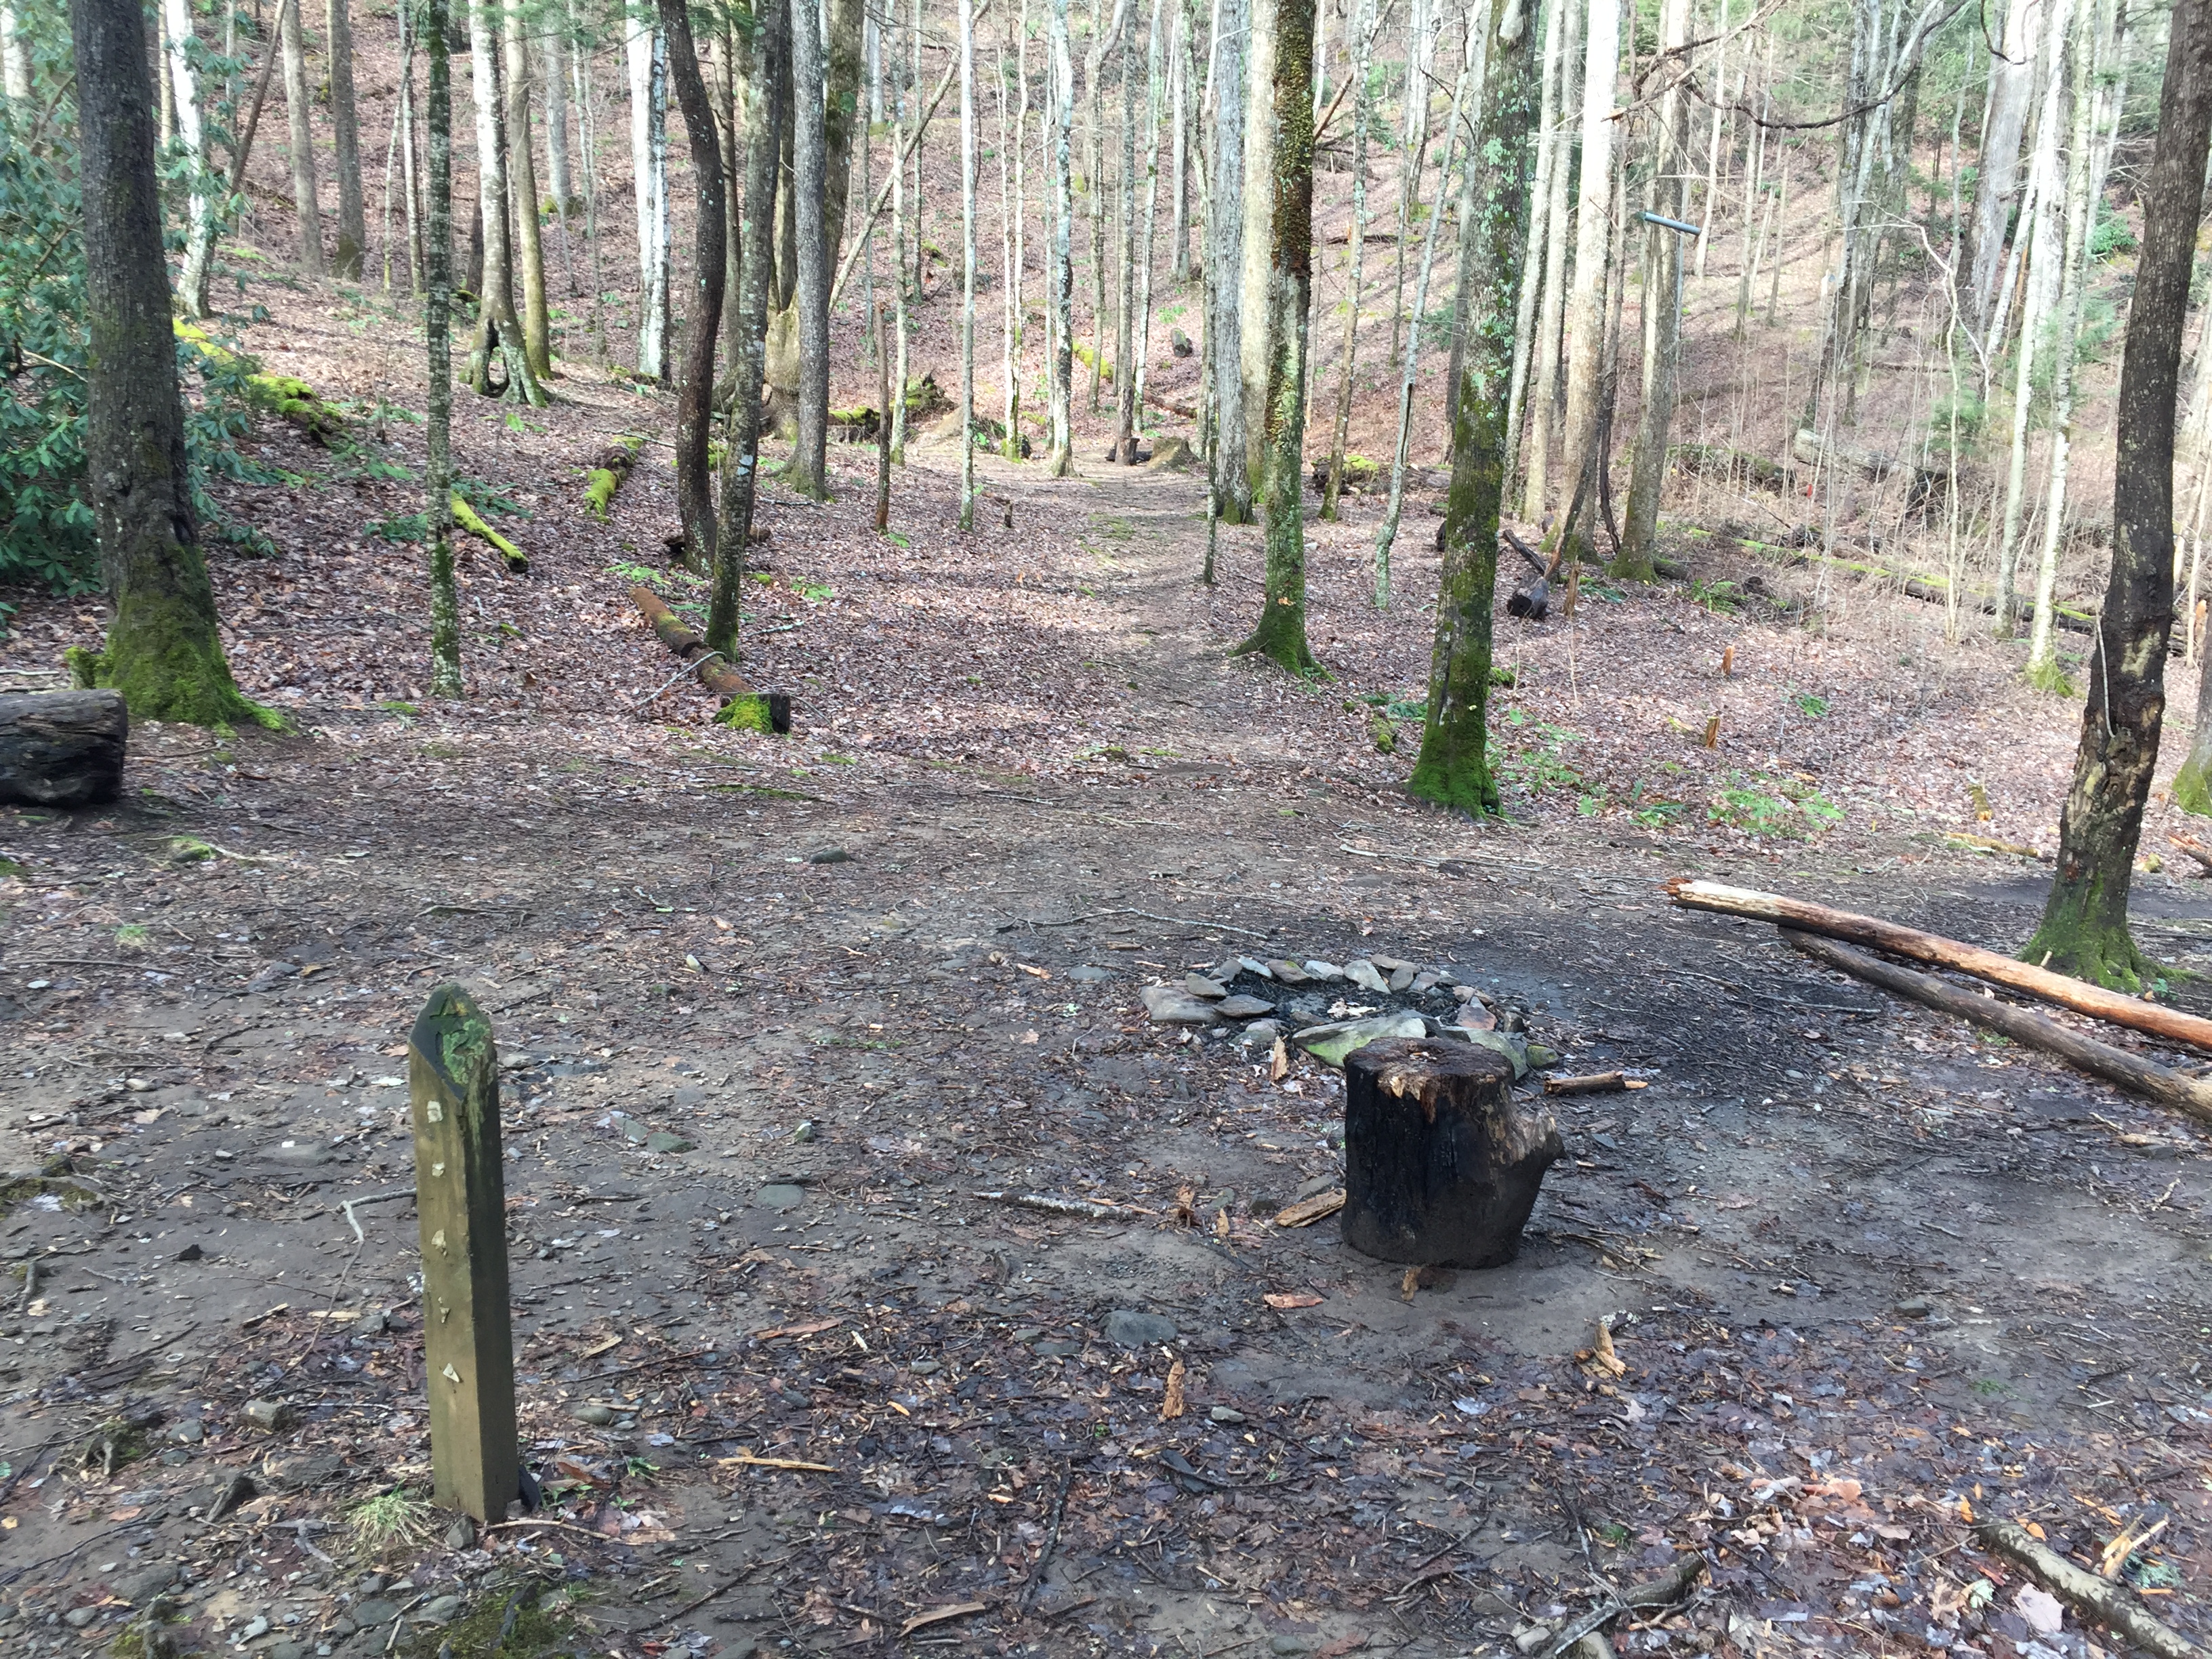
There are nearly 100 backcountry campsites in the Smokies.  Many are idyllic and have become destinations in themselves.  Others are little more than a wide place in the trail.  The NPS website for the Smokies has information about the sites in the Backcountry Permit webpage but it is barley more than a means to make a reservation.

As a way to help hikers make better decisions about where to camp, this rating system has been developed.  It is a 1 – 10 scale with a point given for each of the following criteria:

  • Ready access to water
  • Bear cables – generally a given but some site may not have them
  • Low Impact – little evidence of overuse such as sparse vegetation and general appearance
  • Leave No Trace – includes general layout and spacing of sites relative to the trail
  • Privy
  • Shelter
  • Dry or properly draining tent sites
  • Level tent sites
  • Inspirational location – such as an overlook or river
  • X-Factor – that certain je ne sais quoi

Gregory Ridge Trail

Miles:  5.0 miles           Elevation Gain:   2622↑          Elev./Mi:   524        Grade:  10%          

Difficulty:  Class 5      Hiking Time: 2:10       Pace:  2.31 mph        Avg. Temp.:   72.2      

Total Hike:  11 miles                Total Map Miles:   41.5        Total Miles Hiked:   47.5

Looking North from Gregory Bald

Looking North from Gregory Bald

It’s been months since my last hike.  The reasons don’t matter now.  What matters is the backcountry always welcomes you back.  Too get back in the game, I chose a day hike with a spectacular reward at the top of the climb.  Gregory Bald is a sacred space and with any luck, I would benefit from the off-season and have the place to myself.  Gregory Ridge Trail is the most direct route to the Bald this time of year as Parson Branch Rd. is closed for the season.

High Water on Gregory Ridge Trail

High Water on Gregory Ridge Trail

But first, one needs to navigate Cades Cove to the trail head.  On Saturday’s, the Cove is closed to motor traffic until 9:00 am so there was no need to get there really early.  Traffic, although excruciating (for me), moved along and I was able to get to Forge Creek Road on the back side of the Cove by 10:15.  Great!  There are no other cars in the parking area.  By 10:30, i was under way.  It’s December 26 and it’s 73 degrees.  This hike follows several days of rain so all the creeks are swollen.  Forge Creek is a class 2 rapids threatening some of the foot logs along the way.

The Trail

Gregory Ridge Trailhead

Gregory Ridge Trailhead

The trailhead is at the end of Forge Creek Road, which leads off the Cades Cove Loop road at the Cable Mills Visitor Center. The elevation is 1,955 ft. The first mile of Gregory Ridge Trail is a pleasant stroll on a slight incline as it follows Forge Creek.  You cross a few foot bridges until you reach Campsite 12 at about 2.0 miles.  After several days of rain, there is high water at every crossing and in some cases, the rapids are within inches of the foot log.  Campsite 12 appears to be a bulge in the trail with the fire ring a mere 10 feet within the trail itself.  Just past CS 12, the climb begins to increase and will gain over 2,000 ft. over the next 3 miles at a 13.5% grade.  At about 2.5 miles, the woods open up to a great view of Sugar Cove Ridge.  A little further you can see the first glimpse of Cades Cove.  The climb continues steadily to the intersection with Gregory Bald Trail.

Gregory Bald

Old Man Pine

Old Man Pine

I finished Gregory Ridge Trail in 2:10 for a pace of 2.3 miles per hour.  Gregory Bald is 0.5 miles to the right on Gregory Bald Trail.  The climb continued until finally, the woods gave way to a grassy summit. The wind was steady and cool although not really cold.  At the very summit, there is a benchmark making the elevation along with a very special pine tree that offers some cover from the wind and it is there I had a bite of lunch.  I was thrilled to realize that the mountain belonged to me as there were no other hikers around.  After a rather strenuous hike and a satisfying lunch, I stretched out on the pine needles in the shelter of Old Man Pine and take a short nap.  Then it was time to investigate the bald and take pictures.  I had planned to spend some time reading John Muir but the wind was a bit uncooperative with regard to such an activity.  Nevertheless, I had a time of contemplation while sitting in the grass viewing Cades Cove.  I could see the shiny skins of automobiles reflecting the sunlight from miles away.  Before I knew it, 1.5 hours had passed and I decided to head back down the way I came.  The trip down took 2 hours and by 4:00, I was back in the glacial flow of traffic on the Cades Cove Loop.

Cades Cove From Gregory Bald

Cades Cove From Gregory Bald


Hiking Difficulty – There’s A Category for That

Hiking Elevation

It’s my intention to offer as much information about these hikes as I can so that readers may use it to evaluate and plan their hikes. Originally, I planned only to include total elevation gain and percent grade as the two primary indicators of difficulty but it occurred to me that many other outdoor sports like cycling, rock climbing, kayaking each have their respective difficulty rating systems. So the first thing I did was to research the difficulty rating used in professional cycling.  I found that although there is much subjectivity when it comes to rating climbs for the Tour de France, most rating systems rely on three main parameters; total distance, percent grade and total elevation gain.  This makes sense because a 6% grade over 12 miles could be just as difficult as a 20% grade over 3 miles.

Some rating systems attempt to consider the relative athletic ability of the hiker.  It might also make sense to consider parameters such as weather conditions, trail conditions temperature and humidity and countless others.  But the problem with all these is there are variables that the typical hiker should take into consideration.  So then an objective rating system based on measurable physical characteristics is the proper choice.

With that decided, I set out to try to figure out an algorithm that properly takes these three parameters into consideration and reducing the output to 5 classifications.  Five minutes later, I looked to see if anyone else had already tried.  I found nwkier.com.  It is a web based calculator that simply asks for distance and elevation gain.  You get a number from 1 to 28 which to me is useless.  BUT!  They then categorized these numbers into 6 basic classifications. This works for me.  Perhaps I will try to develop an algorithm at a later date but we will try the nwhiker.com model for now.

Categories

nwhiker.com lists the following categories.  For the blog, I will use these but I will assign classifications as follows:

  • Class 1 – Easy
  • Class 2 – Moderate
  • Class 3 – Challenging
  • Class 4 – Difficult
  • Class 5 – Very Difficult
  • HC – Extremely Difficult (I do love the Tour de France)

Additionally, if I believe trail conditions are not accurately reflected in the difficulty rating, I will add a “+” to the rating.

Happy Hiking!